1. First we start by opening the following picture in Photoshop.
2. Open a curves adjustment layer and change the curve to bring out the highlights of the picture.
3. Select both layers (by pressing CMD or CTRL and clicking on each layer,) and merge them together by pressing CMD (ctrl) + ALT + E
4. Now make a new layer and fill with black.
5. Now for the text. This can be done directly in photoshop, but I have done it in Illustrator and imported it into Photoshop. The following applies if you re doing it Photoshop or Illustrator. Click on the type tool and make a big rectangle over the entire document and fill with writing and change the color to white. I have used Myriad Pro set at 6pt.
6. This step applies only if you did your text in Illustrator. Select your text and copy (CMD (ctrl) + C) and paste (CMD (ctrl) + V) into Photoshop. A box will come up and you want to select 'Smart Object' and press OK. Resize it to cover your image. (Constrain it by holding Shift when resizing.)
7. Now you want to make a layer mask over your text layer.
8. Turn off the text and the black layer by clicking on the eye. Select your merger picture layer and select all by pressing CMD (ctrl) + A, copy the layer by pressing CMD (ctrl) + C, press AT while clicking on the maks layer of the lettering and paste your picture by pressing CMD (ctrl) + V.
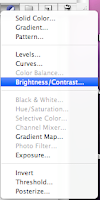
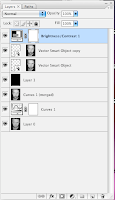
9. Copy your text layer and change the opacity to 46%, add a brightness/contrast adjustment layer and adjust as needed.


10. You should have something like this.
11. Now stand back and admire your work. It is that easy!


1 comment:
Too confused :(
Post a Comment